MiniMart
Please take the time to read through the instructions and take notice of the instructions listed here, as many support related questions can be answered simply by re-reading these instructions.
If you are new with wordpress, please read the wordpress administration panel documentation at http://codex.wordpress.org/Administration_Panels
If you still have a problems, please send us message via our Customer Support Forum, make sure to include the questions/problems, your site url and theme name.
1. Theme Installation
Unzip the zip file that you downloaded and locate the ‘[theme-name].zip’ file inside the ‘theme’ folder. This is the file to upload to your wordpress installation.
Please read this tutorial to install theme: http://codex.wordpress.org/Using_Themes#Adding_New_Themes
Download and activate all plugins listed in below.
If you want quick setup for your website, you can import our xml data sample that from this link, here the step how to import sample data :
- Click ‘Tools >> Import’ then choose ‘Wordpress’.
- Then browse the unpacked xml sample data file.
- Click ‘Upload file and import’
- Now you need to configure the theme menus and widgets.
2. Page Templates and Sidebar
2.1. Page Templates
Default Template (The default page template with right/left sidebar position)
Sidebar: Page Sidebar
Blog (Page template for display blog posts with right/left sidebar position)
Sidebar: Post Sidebar
Homepage with Slider (Page template for Homepage with Slider integrated)
No Sidebar Position
No Sidebar (Page template with one column and no sidebar position)
No Sidebar Position
Portfolio (Page template for portfolio)
Sidebar: No Sidebar
Testimonial (Page template for testimonial)
Sidebar: Page Sidebar
2.2. All Sidebar Position

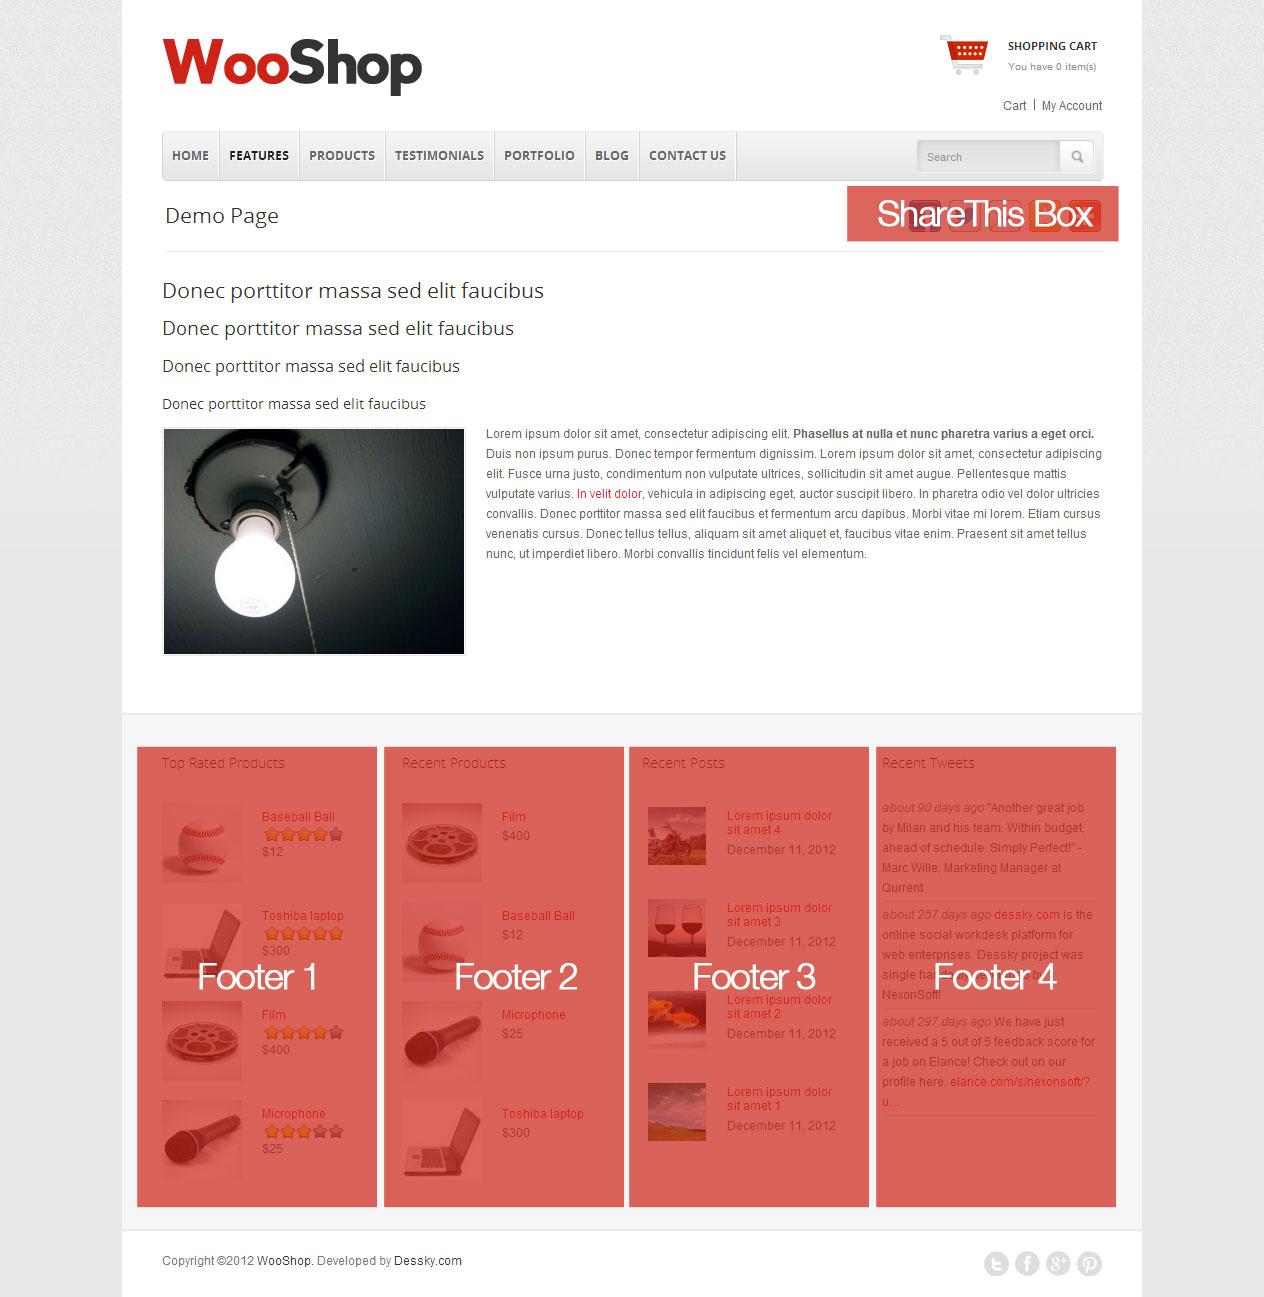
- ShareThis Box – Located in the upper left corner of the page template with sidebar. It is used for Social Sharing 3rd party code.
- Post Sidebar – Located at the left side of archives, single and search.
- Page Sidebar – Located at the left side of page templates.
- Footer1 Sidebar – Located at the footer column 1 of page templates.
- Footer2 Sidebar – Located at the footer column 2 of page templates.
- Footer3 Sidebar – Located at the footer column 3 of page templates.
- Footer4 Sidebar – Located at the footer column 4 of page templates.
3. Menu Settings
The menu setting use the new WordPress 3.0 menu manager, please read the documentation at
http://codex.wordpress.org/Appearance_Menus_SubPanel
Setup menu guide:
- Click the ‘Appearance’ tab then ‘Menus’ Sub Tab
- Add new menu, enter the menu name then click ‘Save’
- Assign the menu to the ‘Main Menu’ location (Just Main Menu for this theme)
- Custom Link: enter your website url in the URL field and ‘Home’ text in the Label field click then ‘Add to Menu’
- Pages: Select the pages that you want to add to menu then click ‘Add to Menu’
- Check the Screen Options (upper right) to insure CSS and Description modules are set to display
- You can add custom css to each menu item, this theme first menu on the left use the ‘home’ css classes. (Not used by this theme)
- Add a description to each main menu item. (Not used by this theme)
- Don’t forget to click the ‘Save Menu’ before you leave this page!
4. Blog
Please read the wordpress documentation regarding writing a post at http://codex.wordpress.org/Posts_Add_New_SubPanel
You also can follow this instruction below:
4.1. Adding a Category
Adding a categories for blog is similar:
- Log in to your WordPress Administration Panel (Dashboard).
- Click the ‘Post’ tab.
- Click the ‘Categories’ Sub Tab.
- You only need to enter the category name field, the other are optional.
- Click the ‘Add New Category’ button and you are done!
- You will see the category you just added in the right side area.
4.2. Writing a Post for Blog
Write your post as you normally would:
- Log in to your WordPress Administration Panel (Dashboard).
- Click the ‘Post’ tab.
- Click the ‘Add New’ Sub Tab
- Input the ‘title’ and your content in contentbox
- As needed, select a category, add tags, and make other selections from the sections below the post. Each of these sections is explained at at http://codex.wordpress.org/Posts_Add_New_SubPanel.
- When you are ready, click Publish.
4.3. Adding a Blog Page
- Log in to your WordPress Administration Panel (Dashboard).
- Click the ‘Pages’ tab.
- Click the ‘Add New’ Sub Tab
- Enter the title ‘Blog’ in the title box.
- Select the ‘Blog’ template in the right ‘Page Attribute’ section.
- Choose the Blog Category from Appearance – > Theme Options -> Blog
- When you are ready, click Publish.
5. Pages Settings
Page are content such as ‘About’, ‘Contact’, etc… for more information about WordPress Page, please see the documentation at http://codex.wordpress.org/Pages_Add_New_SubPanel
5.1. Adding a Pages
- Log in to your WordPress Administration Panel (Dashboard).
- Click the ‘Pages’ tab.
- Click the ‘Add New’ Sub Tab
- Input your Title and Content.
- As needed, you can set the ‘Page Attribute’ in the right side box.
- When you are ready, click Publish.
6. Home Page Settings
Tutorial to add the Home page.
- Click the ‘Pages’ tab.
- Click the ‘Add New’ Sub Tab
- You can name it ‘Homepage’ or ‘Welcome’ or any name that you want.
- Select the ‘Homepage with Slider’ template in the Template ‘Page Attribute’ section.
- Add the home page text and shortcodes in the content editor box. Or you can use our custom layout, please read our documentation #11.
- When you are ready, click Publish.
- In the left side menu, click the ‘Settings’ tab.
- Click the ‘Reading’ sub tab.
- Then change the “Front page displays” to “A static page” and choose the “Homepage” page that you just created.
- Save the settings.
7. Slider
Tutorial to add slider.
- Click the ‘Slider >> Add New’.
- Input the slider ‘title’
- You can ‘upload’ and ‘set featured image’ for slider. This featured image will be used for slider image.
- Input the Slider Option custom field :
- slider-image: the value is the url of the thumbnail image.
- If you add thumb custom field, it wont use the ‘featured image’ as the slider image.
- slider-url: the value is the link url to page, post or any external url.
- If you add the slider-url, the button will show.
- When you are ready, click Publish.
- You can add several slider post to make the animation works.
- You can set the slider setting by going to APPEARANCE >> THEME OPTIONS and click SLIDER Tab.
- To assign slider to a Homepage go to the “Page Edit” and then in a Template box select “Homepage with Slider”
On the link below you can find video tutorial on how to setup a Slider yourself:
http://screencast.com/t/HMB1wmVKDl
8. Portfolio
8.1. Add Portfolio Category
- Click the ‘Portfolio’ tab.
- Click the ‘Portfolio Categories’ Sub Tab.
- Input your category name for your portfolio post.
- Click the ‘Add New Category’ button and you are done!
- You will see the category you just added in the right side area.
8.2. Adding Portfolio posts
- Click the ‘Portfolio’ tab.
- Click the ‘Add New’ Sub Tab
- Now input your title and content.
- You can add Custom Fields like the image below to set the lightbox or external link :
- thumb: the value is the url of the thumbnail image.
- If you add thumb custom field then it will not use the ‘featured image’ as the thumbnail.
- external-link: you can link the image to some URL by putting the URL into external-link value.
- Please NOTE : dont use lightbox customfield if you want to use external-link.
- lightbox: put the full url of the image/video location to make the portfolio image show the lightbox.
- Select the Portfolio category in the right ‘Portfolio Categories’ section.
- When you are ready, click Publish.
- You can add as many display posts as needed.
8.3. Add Portfolio Page
- Click the ‘Pages’ tab.
- Click the ‘Add New’ Sub Tab
- Enter the title ‘Portfolio’ in the title box.
- Select the ‘Portfolio’ template in the right ‘Page Attribute’ section.
- after that you need to set the portfolio page by going to APPEARANCE >> THEME OPTIONS and click Portfolio tab.
9. Testimonial
9.1. Adding Testimonial posts
- Click the ‘Testimonial’ tab.
- Click the ‘Add New’ Sub Tab
- Now input your title and content.
- You can ‘upload’ and ‘set featured image’ for testimonial. This featured image will be used for testimonial image.
- Set Featured Image
- When you are ready, click Publish.
- You can add as many display posts as needed.
9.2. Add Testimonial Page
- Click the ‘Pages’ tab.
- Click the ‘Add New’ Sub Tab
- Enter the title ‘Testimonial’ in the title box.
- Select the ‘Testimonial’ template in the right ‘Page Attribute’ section.
10. Sidebar Generator
10.1. Add Sidebar in Theme Options
- Go to the ‘Appearance’ tab.
- Click the ‘Sidebar Manager’ Sub Tab.
- Click the ‘Sidebar’ Tab.
- Input the ‘Sidebar Name’ in the Sidebar Generator Textbox!
- Click ‘Add’ and in a second the sidebar name will appear in the bottom of the textbox.
- The sidebar will appear in APPEARANCE >> WIDGETS
- The sidebar will appear in your edit page too.
11. Custom Layout
You can use custom layout on this theme, you only need to copy and paste the code below into a post content.
11.1. Home Page Layout
<div class="twelve columns alpha">[blockquote] Suspendisse potenti. Maecenas eget ultricies leo. Fusce quis leo nisi. Maecenas mattis, nisi quis facilisis ornare, lorem erat dapibus diam, sit amet tristique ante diam eget lorem. Lorem ipsum dolor sit amet, consectetur adipiscing elit. Nullam id turpis in ligula imperdiet lacinia. [/blockquote]</div>
<pre><div class="middle-content">
<div class="four columns alpha">

<img class="aligncenter" alt="" src="./wp-content/themes/minimart/assets/images/laboratory.png" />
<h2>Our Lab</h2>
Lorem ipsum dolor sit amet, consectetur adipiscing elit. Sed ultrices dui eu lectus fringilla non pellentesque magna egestas. Suspendisse potenti. Vivamus at magna libero. Donec et purus nunc, eu aliquam diam.

<a class="button" href="#">Read more</a>

</div>
<div class="four columns omega">

<img class="aligncenter" alt="" src="./wp-content/themes/minimart/assets/images/support.png" />
<h2>Support</h2>
Lorem ipsum dolor sit amet, consectetur adipiscing elit. Sed ultrices dui eu lectus fringilla non pellentesque magna egestas. Suspendisse potenti. Vivamus at magna libero. Donec et purus nunc, eu aliquam diam.

<a class="button" href="#">Read more</a>

</div>

<div class="four columns omega">

<img class="aligncenter" alt="" src="./wp-content/themes/minimart/assets/images/phone.png" />
<h2>Contact Us</h2>
Lorem ipsum dolor sit amet, consectetur adipiscing elit. Sed ultrices dui eu lectus fringilla non pellentesque magna egestas. Suspendisse potenti. Vivamus at magna libero. Donec et purus nunc, eu aliquam diam.

<a class="button" href="#">Read more</a>

</div>
</div>
[blockquote] Suspendisse potenti. Maecenas eget ultricies leo. Fusce quis leo nisi. Maecenas mattis, nisi quis facilisis ornare, lorem erat dapibus diam, sit amet tristique ante diam eget lorem. Lorem ipsum dolor sit amet, consectetur adipiscing elit. Nullam id turpis in ligula imperdiet lacinia. [/blockquote]
[featured_product] [/featured_product]
<img src="http://demo.dessky.com/minimartlite/wp-content/uploads/sites/5/2013/10/banner4.jpg" alt="Placeholder" class="alignnone size-full wp-image-284" />
11.2. Contact Page Layout
(in order for this to work you need to have Contact Form 7 plugin installed)
[contact-form-7 404 "Not Found"]
12. Plugins, Widget and Shortcode
12.1. Plugins
Install some plugins (listed below). Search for the plugin name from within wordpress admin, then add and activate it. Some plugins can conflict with the theme, but the ones listed below have been tested to work, and also extra styling for the plugins has been added. Only add those that are needed. Adding too many will slow down your website.
Contact Form 7
Download: http://wordpress.org/extend/plugins/contact-form-7/
Description: Simple contact form for contact page.
WP PageNavi
Download: http://wordpress.org/extend/plugins/wp-pagenavi/
Description: For page navigation.
WooCommerce
Download: http://wordpress.org/extend/plugins/woocommerce/
Description: WooCommerce is an elegant easy to use fully featured shopping cart application suitable for selling your products, services, and or fees online.
Wordpress Importer
Download: http://wordpress.org/extend/plugins/wordpress-importer/
Description: Import posts, pages, comments, custom fields, categories, tags and more from a WordPress export file.
12.2. Custom Widget
Dessky – Recent Post
This widget is used for display recent post, blog, news in the left and the right sidebar position, you can activate this widget on any pages.
Dessky – Recent Comments
This widget is an alternate of the default Recent Comments widget, it show the comments.
Dessky – Recent Tweet
This widget is used for display twitter.
12.3. Shortcodes
Column Shortcodes
[one_half class=""] ...your content here... [/one_half]

[one_fourth class=""] ...your content here... [/one_fourth]

[one_third class=""] ...your content here... [/one_third]

[one_third class=""] ...your content here... [/one_third] [two_third class=""] ...your content here... [/two_third]

[one_fourth class=""] ...your content here... [/one_fourth] [three_fourth class=""] ...your content here... [/three_fourth]
class – [string]
Specify the class for your column. if you want to remove the margin left in your column you need to add “firstcols” in your class parameter. and to remove the margin-right you need to add “lastcols”.
Separator Shortcode
[separator line=""]
line : “yes”
Tabs Shortcode
[tabs]
[tab title="title1"] ....your content here.... [/tab]
[tab title="title2"] ....your content here.... [/tab]
[/tabs]
Toggles Shortcode
[toggles]
[toggle title="toggle1"] ....your content here.... [/toggle]
[toggle title="toggle2"] ....your content here.... [/toggle]
[/toggles]
Pullquote Shortcode
[pullquote position=""] ....your content here.... [/pullquote]
position : “left” or “right”
Blockquote Shortcode
[blockquote] ....your content here.... [/blockquote]
Dropcap Shortcode
[dropcap type=""] ....your content here.... [/dropcap]
type : “circle”, “square”, “default”
Highlight Shortcode
[highlight type="grey"] ....your content here....[/highlight]
type : “grey”, “black”
Featured Product Shortcode
[featured_product orderby="..." ] ....your content here....[/featured_product]
title : title name for the featured product
orderby: Defaults to ‘date’, ‘none’, ‘ID’, ‘author’ , ‘title’, ‘modified’ , ‘parent’, ‘rand’
order: Defaults to ‘DESC’, ‘ASC’
Best Seller Shortcode
[best_seller orderby="..."] ....your content here....[/best_seller]
title : title name for the Best Saller
orderby: Defaults to ‘date’, ‘none’, ‘ID’, ‘author’ , ‘title’, ‘modified’ , ‘parent’, ‘rand’
order: Defaults to ‘DESC’, ‘ASC’
13. Translating MiniMart theme
1) First you need to study in detail official Wordpress translation manual.
2) Make sure to edit .po file located in the minimart/framework/languages directory and after you finish export it as .mo file in the same folder.
3) in the wp-config.php add this line:
define('WPLANG', 'en_EN');
Pay attention to the naming of the WPLANG variable that must be same as the language .mo file name located in the wp-content/themes/minimart/framework/languages .
For example, if you wanted to use French, you would have minimart/framework/languages/fr_FR.mo file and in the wp-config.php you would have
define('WPLANG', 'fr_FR');
13.1 Available MiniMart translations (.po and .mo files)
1) Turkish – this translation pack is here with us thanks to Okan Caliskan! 
14. Other Settings
14.1. Theme Options
Some settings that you can change easily through theme options. Moreover, we have 3 parts of Options.
14.2. All Images Size
Images size used in this theme:
- post-slider: 940px × 450px
- post-blog: 690px x 227px
- post-thumb-small: 58px x 58px
- post-testimonial: 104px x 104px
- post-col4: 420px x 214px
- home-thumb-small: 110px x 110px
14.3. Featured Images
You can ‘upload’ and ‘set featured image’ for portfolio and slider. This featured image will be used as thumbnail.
- When adding a new post, you will see in the right side area the ‘Featured Image’ box.
- Click the ‘Set featured image’ link.
- You will see the wordpress media uploader window show up.
- Select image to upload.
- After upload you will see the image information.
- Click the ‘Use as fetured image’ link in the bottom.
- Done, just close the window.
- If you want to use this image as post image, just click the ‘Insert into Post’ button.
15. FAQ
15.1. My sidebar is all messy and widgets are overlapping – what should I do?
This happens because your widgets are not setup correctly.
In the ShareThis widget area only code from the addthis.com service should be placed.
In order to fix the problem set widgets areas "ShareThis Box", "Post Sidebar", "Page Sidebar" like on this screenshot.
15.2. Where can I get social icons?
Social icons are provided by the addthis service . You should generate social media codes there and past them in the "ShareThis Box" widget area using the standard Textual widget like on this screenshot.
15.3. How to translate text "Shopping Cart", "You have", "items", "Search", "Log Out", I can not find them in .po and .mo files.
It seems that you are using older theme version since this issue was fixed in version 1.2.0 – Once you download new theme version you will be able to find this text in the language file.
15.4. How to change drop down sub-menu width? Right now it is to narrow.
Try this, go to the file: minimart/assets/js/functions.min.js .
Then find the code:
supersubs({minWidth:12,maxWidth:12
And change minWidth and maxWidth parameters to the higher value that suits you.
15.5. Which sidebar area should I use on product pages?
Sidebar area that is used on the product pages is called “Post Sidebar” so you should place widgets in that sidebar area in order for them to be displayed on the product pages.
15.6. How to properly upgrade MiniMart theme from version 1.2.2- to a new 1.2.3+ version?
If you have used MiniMart with version number 1.2.2 (or lower) and you wish to upgrade to 1.2.3 (or higher) version simple file overwrite will not apply all updates and fixes.
Reason for this is that MiniMart 1.2.3 is a major update and in order for all changes to be applied you will first have to delete your old minimart theme folder via FTP client and then upload a new theme version.
Make sure that if you have made code customizations to the previous theme version you have a backup of the old theme version before deleting it.